In the world of networking, Layer 2 switches are important devices. They help connect different devices in a network. But why would a Layer 2 switch need an IP address?
Understanding Layer 2 Switches
A Layer 2 switch works at the Data Link layer of the OSI model. It uses MAC addresses to forward data to the right device. This is different from routers, which use IP addresses.
What is an IP Address?
An IP address is a unique identifier for a device on a network. It helps devices communicate with each other. Think of it as a postal address for your computer.
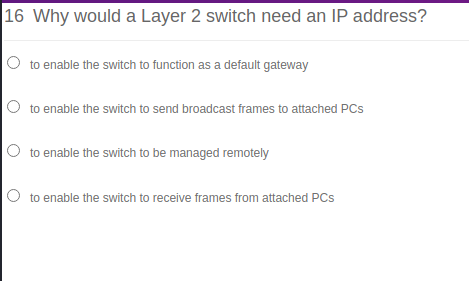
Credit: www.chegg.com
Reasons for Assigning an IP Address to a Layer 2 Switch
Even though a Layer 2 switch does not need an IP address to forward data, there are good reasons to assign one:
1. Management
An IP address allows you to manage the switch. You can access the switch’s settings from anywhere in the network. This makes it easy to configure and monitor the switch.
2. Monitoring
With an IP address, you can monitor the switch. This helps you keep track of its performance. You can also check for any issues that might arise.
3. Remote Access
If the switch has an IP address, you can access it remotely. This means you do not need to be physically near the switch to make changes. This is very useful for large networks.
4. Network Troubleshooting
An IP address helps in troubleshooting network problems. You can use tools like ping and traceroute to find issues. This makes fixing problems easier.
How to Assign an IP Address to a Layer 2 Switch
Assigning an IP address to a Layer 2 switch is simple. Here are the steps:
1. Connect To The Switch
First, connect to the switch using a console cable. You can also use Telnet or SSH if the switch supports it.
2. Enter Configuration Mode
Next, enter the configuration mode. This is where you can make changes to the switch’s settings. You usually need to enter a password to access this mode.
3. Assign The Ip Address
Now, assign the IP address to the switch. You will also need to assign a subnet mask. Here is an example:
            Switch(config)# interface vlan 1
            Switch(config-if)# ip address 192.168.1.2 255.255.255.0
            Switch(config-if)# no shutdown
4. Save The Configuration
Finally, save the configuration. This ensures that the IP address is kept even after the switch is restarted. Use the following command:
Switch# write memory
Benefits of Assigning an IP Address to a Layer 2 Switch
Assigning an IP address to a Layer 2 switch has many benefits:
- Easy management and configuration
- Remote access for convenience
- Better monitoring and performance tracking
- Efficient troubleshooting of network issues

Credit: www.ipoasis.com
Frequently Asked Questions
What Is A Layer 2 Switch?
A Layer 2 switch is a network device. It operates at the data link layer.
Why Does A Layer 2 Switch Need An Ip Address?
An IP address helps in management tasks. It allows for remote access and configuration.
Can A Layer 2 Switch Work Without An Ip Address?
Yes, it can. But it won’t support remote management or configuration.
How Do You Assign An Ip Address To A Layer 2 Switch?
Access the switch’s console. Use the command line interface to set the IP address.
Conclusion
In conclusion, assigning an IP address to a Layer 2 switch is very useful. It helps in managing, monitoring, and troubleshooting the network. By following the simple steps, you can easily assign an IP address to your switch. This will make your network more efficient and easier to handle.